Translate

Showing posts with label children. Show all posts

Carpentry Fun Time: Sawing and Measuring

Just like the title says, let's get to sawing and measuring! Of course, we'll need a saw. I suggest a hand saw (2nd picture below), coping saw (1st picture below) or one of each. Make sure that they are the correct size for your child.

Also, we'll need rulers, a yardstick, tape measure and a T square if you have one available. Don't forget something to measure and cut! Have a few C clamps, plastic foam, thick pieces of cardboard and some wood pieces and boxes ready.


Sawing Practice


Source: MominMadison
Make sure they set up their work space and workbench while you gather the above items. Before having your child jump right in and start sawing logs, let's ease them into it. Have them practice through a few thick pieces of cardboard. You can even use large pieces of plastic foam.

 Show them how to use the clamp to clamp down the foam to their workbench. Then demonstrate with the hand saw how to saw through the foam or cardboard. Take all the time you need to explain what the saw does and how to handle it safely.

Guide them as they take their turn and encourage them if they get disoriented or discouraged. Have them changing materials and try sawing some more!


Sawing Wood


 Your child will need many supervised opportunities to saw through wood. If you can, make sure that the wood is of the softer variety. Help them saw in a straight line by drawing a guideline on the wood with a pencil and a T square, yardstick or ruler.

Source: Penticton Western News


You may want to explain to them about the sawdust collecting on the floor beneath where they are sawing and that it will need to be cleaned up every time they finish working in their work space.

I know I sound crazy, but walking them through every step of the process of woodworking now will develop good habits that will stand them in good stead for the future. 

Naturally, this means that you'll have to lead by example, so don't be a slacker. Clean up, clean up, clean up!


Measuring Practice


Now, sawing is a lot of fun, and if all you want your child to do is cut things safely, then your job is done. But don't we want them to be able to make things? Well, they'll need to know where to start cutting, won't they?

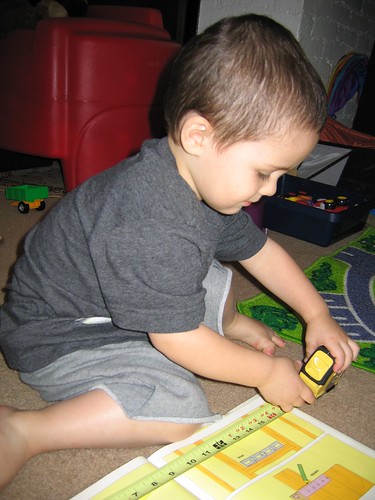
Ahh, looks like they'll need to know how to measure! Alright then. Let's get out the rulers, yardsticks and tape measure. Let your child use the tools to practice measuring the heights, widths and/or lengths of objects around the room; tables, chairs, their arms and feet! How about your arms and feet? Ask them questions like “Which chair is wider? Is your foot longer than Mommy's/Daddy's? How tall are you?

Source:  Dryss


Obviously measuring will require some mastery of numbers, so this gives you a perfect opportunity to help them with that.

Ease them into it. Repeated measuring is something that can actually help your child improve their ability to recognize numbers and the order they come in.


Working with Squares


Oh, I forgot to tell you one thing. You'll need blank paper and pencils for this one. Sorry.

Anyhow, completely cover a table with paper. Set out the pencils and a T square. Let your child practice drawing lines on the paper, using the T square as a guide. You can also use a ruler, but getting them accustomed to the T square will enable to them to be ready to use it effortlessly on their woodworking project when they are ready. Add wood pieces or boxes and let them measure the sides and ends.


Measuring is so much fun that your child will probably start measuring everything in your house and telling you how long it is, how high it is, etc. Be ready for that. Ask them how long Daddy's shoe is in comparison to Mommy's shoe, or their own. Ask them how long the dog's tail is, if you have a patient dog. Encourage their curiosity about numbers. Who knows, maybe they'll become an accountant—just kidding!

And never forget to carpenter's mantra.

Measure twice. Cut once.


Carpentry Fun Time: Sawing and Measuring

Carpentry Art!

The great thing about art is that it can be a collaborative effort. Don't just watch your child and their friends have fun. Get in there. Get your hands dirty!

DSC_0103

Ready? Let's see...we are going to need a piece of plywood (2 ft x 3 ft should do it), a variety of wood scraps, wood glue, starter nails, canning jar lids (frozen juice can lids will also work), clean (and empty) soup cans, yarn, two cups of flour, 4 cups hot water and sawdust. And maybe some paint.

Ahh, now you're curious, aren't you?

Well, here we go!


Carpentry Collage


This first one is easy-peasy. Set out the 2 x 3 piece of plywood and the wood scraps. Did your child set up their work space and workbench? 

Source: edenpictures


Okay, good.  Have them nail or glue the scraps to the plywood to make a collage. 

Decorate to taste. 

Have them clean up. 

 Done.

Next.


Junior Tinsmith


This requires a teensy bit of prep work on your part. On either the canning lids or frozen juice can lids, draw dotted outlines of simple shapes: triangles, squares, stars, you get the idea. Place the lids on wood blocks and show your child how to lightly nail through each dot to create a see-through hole. Once they can see through where all the dots used to be, voila! Design complete. Now all you need to do is punch a hole in the top of each lid and tie a loop of yarn for hanging. As a reminder, make sure they are hammering on a wood block and not directly onto the workbench. We're forming habits, remember? Let's make them good ones.

Source: Steadyjohn


This one is always a favorite. Oh, I forgot. You'll need some twine or string for this one. Oops. Anyway, take two of your cleaned empty soup cans (chicken noodle is my favorite!) and place them with the open end down on the workbench. You can draw a dot in the middle of the lid, if you want. Have your child create a see-through hole - - just one.

Do the same with the other can. Help them string the twine through the hole and make a knot, big enough so that it won't come out. Make the twine as long as you want before doing the same with the other can. Know what you have? Instant tin-can telephone!


Sawdust Clay


Sounds crazy, right? Well, you cooks will love this one because it will require some time and preparation to do it right. You (not your child) should combine the two cups of flour and four cups of hot water and mix until thick and clear. 

 Now, stir in fine sawdust (see what I mean about the preparation?) until the mixture resembles modeling clay. Have your child create sculptures with the clay. Leave the sculptures to dry and harden. Once hardened, your child can sand and paint to their liking. Once you have enough sculptures, be ready to host an art opening!

These art projects are great for one or more than one. After your child has made some art and is ready to share their new-found passion, have them invite a friend or two over to join the fun. Keep it supervised and orderly so everyone can enjoy making art. Like I said, don't just watch your child and their friends have fun. Get in there. Get your hands dirty!


 Woodworking Plans Banner


Carpentry Art!

Carpentry Fun Time: Learning To Hammer


Source: lvg4him
I know I shouldn't do this, but I'm going to assume that you've explained to your child the difference between a toy hammer and a real one. If you haven't done so, I suggest doing this before proceeding. It's a safety issue and well as a great teaching opportunity. Also, make sure your child's hammer fits comfortably in their hand, not yours.

Okay then. Let's get started!


Hammering is Fun

Make sure you have some large-headed nails, part of a tree stump or a small log or two and maybe a large chunk of plastic foam. After you've helped your child set up their woodworking space, position the piece of wood securely on their workbench. Have them pound the large-headed nails into the wood. You may need to show them how to do it at first, but trust me, they'll quickly get the hang of it.

I suggest using pliers to hold the nail as you hammer so that your child will follow your example. How much do you trust your child's aim? Maybe you want to hold the nail at its base while they swing away. Hey, it's your hand.

If you have a big block of plastic foam, you may have them hammer nails or even golf tees into the foam. Later, you can pull them out. Smart, huh?


Flatten the Bottle Cap 
(or Nail Down the Soda Tab)

Yes. I know.

Bottle caps are hard to find. Just hear me out.

Let your child hammer some bottle caps flat on a block of wood; not the workbench. Once they have enough bottle caps flattened, the caps can be nailed in piles of three or four to the ends of narrow pieces of wood to make rhythm shakers.

Source: Jim Hoying
No bottle caps around? Okay, try this. Collect pull tabs off soda pop cans. You'll have to get creative with this, but if you can find some really large-headed nails, you can skip the flattening part and go right to nailing down the pull tabs onto your piece of wood. Can you make a rhythm shaker out of it? What else can you make out of pull tabs and wood?


Nail Pictures

This is a fun project for older children. Take some wooden boards and draw shapes on the boards. Have your child hammer nails onto the shape outlines to make nail pictures. You can even draw alphabet letters or numbers on the boards and create your own nail picture “flash boards.” Once your child has cleaned up their work space and put their hammer and all supplies away, another woodworking project is complete!


Children will love these projects and will most likely not notice that they're learning at the same time. By the time they realize that they are learning, they'll have associated learning with fun. Not bad, right?


TedsWoodworking Plans and Projects

Carpentry Fun Time: Learning To Hammer

Carpentry Fun Time: Sanding Games for Children


If your child can hold a piece of sandpaper, they can begin their first woodworking project! 

Think I'm crazy? Watch, I'll prove it to you. 

But first, take your child on a field trip to get scrap wood. Go to a local lumber yard or construction site and ask the yard/site manager for any scraps that they may have. Use your discretion on the size of the scraps based on what your child can easily handle; or better yet, let them choose which scrap pieces to take home.


Fun with Sandpaper

Source: threeseamonsters
Well first, here's one quick project that you can do with them to teach them about what sandpaper does. Once you've helped them set up their woodworking space, set out some sandpaper of different grades, ranging from extra-fine to coarse. Show them how to use the sandpaper on a piece of scrap wood, explaining to them what you're doing.

Then let them experiment with sanding the wood. As they work, encourage them to tell you how the wood changes. Once they get the hang of it, have them experiment with the different grades of sandpaper. Are they having fun yet? See? Now your child is ready for their first real woodworking project. 


Building Blocks

This one is simple. Get some paint ready while your child uses the sandpaper to smooth several wood block scraps from the lumber yard or construction site. After they decide that the blocks are smooth enough, have them paint the wood scraps to make a set of building blocks. Once the paint drys, voila! Project number one is complete and your child has extra building blocks to add to their collection. 

Now we're ready to get advanced.


Sanding Blocks

Source: brendan64xl
You'll need to have sandpaper, wood glue and wooden spool “handles” ready to go for this one. Give your child two small wood blocks and have them sand their blocks down until they are smooth. Next, help them glue sandpaper squares to one side of their blocks and a wooden spool “handle” on the other side. When the glue has dried, your child now has sandpaper blocks that they can use as rhythm instruments. Woodworking project number two complete! Well, almost. Guide your child through the process of cleaning up their work space and putting all their supplies away in their proper places. Okay, now their project is complete.

Children under the age of three will love these projects and will probably want to know when they can make some more sand blocks or building blocks. 

Pretty good start huh? 

The great thing is, now that they know how to sand, your child can help you with your woodworking projects!


TedsWoodworking Plans and Projects

Carpentry Fun Time: Sanding Games for Children

Carpentry Tips and Hints for Children of All Ages


Every hobby has its issues regarding tools, storage, clean up and safety. Woodworking, carpentry and woodcraft are no different. Teaching children good habits early is a sure way to enhance their enjoyment of working with wood and will serve them well for years to come. Though these tips are geared towards folks who will be teaching woodworking and carpentry to children, I think there may be something useful here for woodworkers of all ages. 

Tools 

Woodworkers tend to develop their own system for storing tools in their work space. Since your children aren't there yet, these suggestions will help get your children on the right track. Use a piece of pegboard and trace the outlines of their tools onto it. Add the appropriate hooks and label each outline. Make sure you attach the pegboard to a wall at your child's eye level. As they grow, you can move it up to match their eye level. Use this as a way to show them the progress they're making in their hobby. 

After each use of a tool, encourage them to hang the tool up in it proper place. Safety starts with you. Show your child the correct way to use and care for each of their woodworking tools. You can even make a game out it. Set out examples of toy and real tools and discuss the differences between them. Then have your child separate them into two groups; toys in one pile and real ones in another. You can even ask questions like" How can you tell that this is a toy hammer and not a real one?" 

Storage and Clean Up 

We've covered the storage of tools, but we still have to store supplies - wood glue, fabric, nails, screws, etc. Provide a separate storage bin (with lid) for each kind of supply material used in the work space and store the bins in the same place after each woodworking session. This instills the idea that everything used has its proper place when it's not being used. After you and your child have finished a session in your work space, have the child put the tools and supplies away in their proper hooks/bins. 


Make sure that you have a small broom and a dustpan handy so that the child can clean up their work space. The reason for this should be obvious. Also, keep a big magnet handy. It's a fast and safe way for the children to collect any stray nails and screws around the woodworking space. Just a reminder - the magnet won't attract anything made out of aluminum. 

Safety 

Here's a few safety tips to help you keep everyone safe and having fun. If you have more than one child working in the woodworking space, limit the number of children that can work at the workbench at one time. Use your discretion, based on the size of the work space, the workbench and obviously the size of your children! Also make sure you have adequate tools and supplies for everyone participating. Encourage your children to help one another while they are working. And make sure your children wear their safety goggles at all times while they're in the woodworking area. 

Don't forget to remind your child to use the correct tool for the job. You may ask them what tool they would need to make a piece of wood shorter, what they would use to attach one piece of wood to another, that type of thing, in order to make sure that they know what each tool is designed to do. Also, teach your child to use C clamps instead of their hands to hold boards for hammering or sawing. This is the reason you'll want to make sure that at least one side of the workbench has an edge that can hold a clamp. 

Tools stay in the woodworking space only. And no running with tools of any kind. Show your child how to keep their tools in good working condition. This issue may not come up right away, but it's my job to remind you not to forget! This may go without saying, but I'll say it anyway. Whenever children are working in the woodworking space, there must be adult supervision. Remind your child not to hammer, saw or drill into the workbench, even if it looks like a fun thing to do. And by no means allow them to put nails, screws or any other supplies in their mouths. Which, of course, means that you shouldn't do it either, because your child will almost always do what you do before doing what you say. 

Finally, if your child is becoming too stressed or tired while working in the work space, offer to set the project at hand aside so that it can be finished at a later time. However, make sure that they clean up their work space and store all tools and supplies before leaving. If you start cleaning up after them without them helping, you may end up doing it the rest of their lives (and yours). 


Age-Appropriate Activities 

My opinion is that children should be at least three years old before being allowed to start woodworking. Three-year-olds will enjoy the process of sanding, hammering, sawing, etc. more than actually building things. Provide your child with many opportunities to develop these carpentry skills, and they'll start wanting to use them. In terms of introducing tools to your child, start with the hammer. It's the easiest tool for young children to manipulate. Introduce the saw last. It is the most dangerous and the most difficult carpentry tool to master. What about sandpaper, you say? Technically, sandpaper is a supply material. You can introduce them to sandpaper as early as you think appropriate. And always adapt all woodworking activities to fit the individual needs of your child. You know them best. 

Four-year-olds will gradually want to nail or glue pieces of wood together. Encourage them to create their own masterpieces, which you can display around the house. As they gain experience, they will eventually want you to help them build SOMETHING, like a toy box or a bird house or a napkin holder. 

The beautiful thing about woodworking is that is provides opportunities to problem-solve. The problems can as varied as "Which nail works best?" to "How high can I stack this wood?" to "What shape works best for wheels?" Encourage your child to experiment when seeking solutions. Allow them to discover the correct answer, or at least ask them questions that will steer them in the right direction, so that the joy of discovery can be all theirs.

Getting Your Children Started in the Craft of Woodworking

Whether you're a mother, father, grandma, grandpa, aunt, uncle or teacher, if you have children around you, they have a natural inclination to build things. And to break things. 


Why not use the hobby of woodworking as a way to refine (and even temper) those child-like inclinations before they become more destructive? It's easy, can be done in short time intervals and it's fun! 


You'll need a work space for your child to create their wooden magic. It should be spacious and situated away from their normal play area. Although this new hobby of woodcrafting is fun, you are also using it as a teaching tool, so you don't want to confuse your child by making woodcrafts in the same space that they would normally play in. A corner of the basement, garage or patio will do. A separate area outside would work as well. 


  You will also need a workbench that is low enough for your child to bend over when they are sawing or hammering. Anything durable will do, as long as at least one end can hold a clamp. Try an old table cut down to size, a sturdy wooden box, maybe even an elementary school desk. Check thrift stores and garage sales. 


Here's my suggestion when it comes to tools: purchase real ones in small sizes from a hardware store or a big box store like Home Depot, Lowe's or Menards. Don't use toy tools that you can buy in the toy department of a store. You want your child to have fun AND learn the correct way to make things out of wood. This is about refining and tempering those child-like inclinations, remember? I tend to believe that if you start with what you have, you can add to the list as your child shows interest and progresses. 


As for the list of tools, here goes:


* safety goggles (a must have) 


* claw hammer


* ball-peen hammer 


* hand saw


* coping saw


* flat head screwdriver


* Phillips head screwdriver


* hand drill


* pliers


* C clamps


* rasp


* ruler


* T-square


 Now we need supplies. Keep a variety of the following on hand in your work space: various grades of sandpaper, different kinds of large screws, nails with big heads, wood glue, bottle caps (if you can find any!), fabric pieces, wooden beads and the like. Last, but certainly not least; what's the most used resource in the craft of woodworking? No guesses? 


Why wood, of course! You can keep yourself in a pretty good supply of free wood by going to your local grocery store and asking for wooden boxes. Many lumber yards and construction sites have piles of wood scraps. Speak with the store/site manager about your request. And bring your child along! Call it a field trip. Give your child a paper bag with their name on it for bringing home wood pieces. I ask you, how many managers can say no to a child? 


I trust that these basics of work space, tools and supplies will give you some ideas about how to prepare for introducing your child to the hobby of woodcrafting. 


In future articles I will cover the subjects of the best ways to explain to your child how to use tools, store them, and even some games you and your child can play while woodcrafting. 


TedsWoodworking Plans and Projects